How to Make a Flying Geese Quilt Block Using the Stitch and Flip Method
This post may contain affiliate links, which means that I may earn a commission if you make a purchase using these links. As an Amazon Associate, I earn from qualifying purchases.
What is a flying geese quilt block?
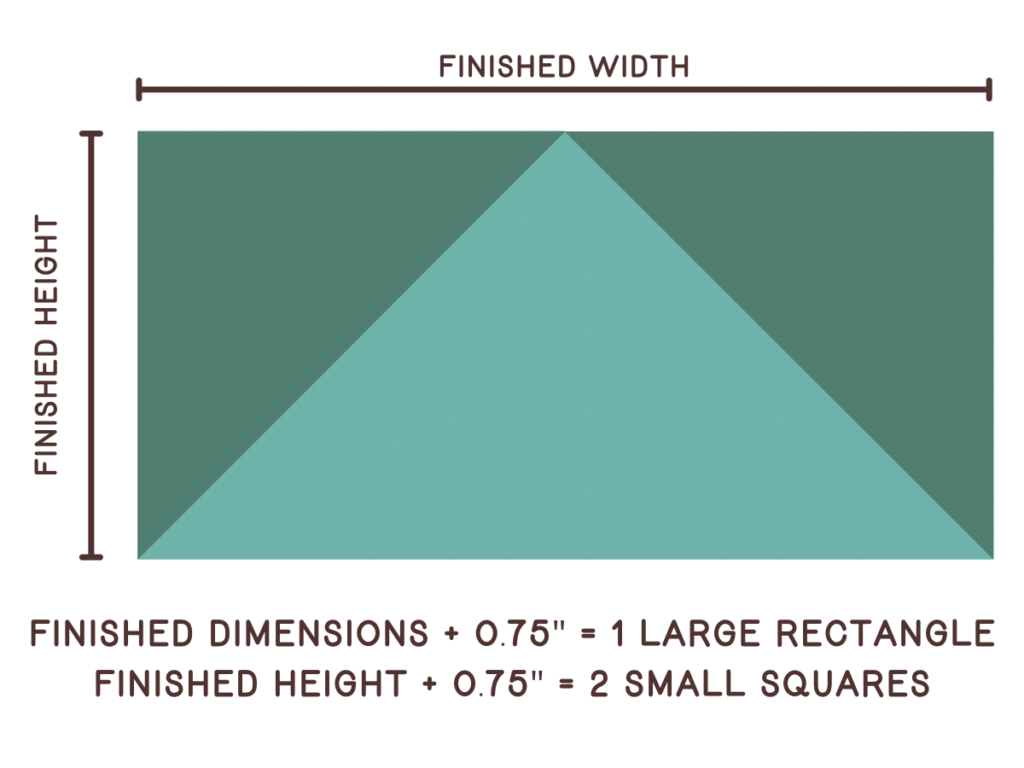
Flying geese are commonly used building blocks in both traditional and modern quilt patterns. A flying geese block is made up of 1 large triangle and 2 smaller triangles on either side, with the middle triangle giving an abstract appearance of a goose in flight. The dimensions are always 2:1 (width:height).
How to calculate fabric cuts for Flying Geese
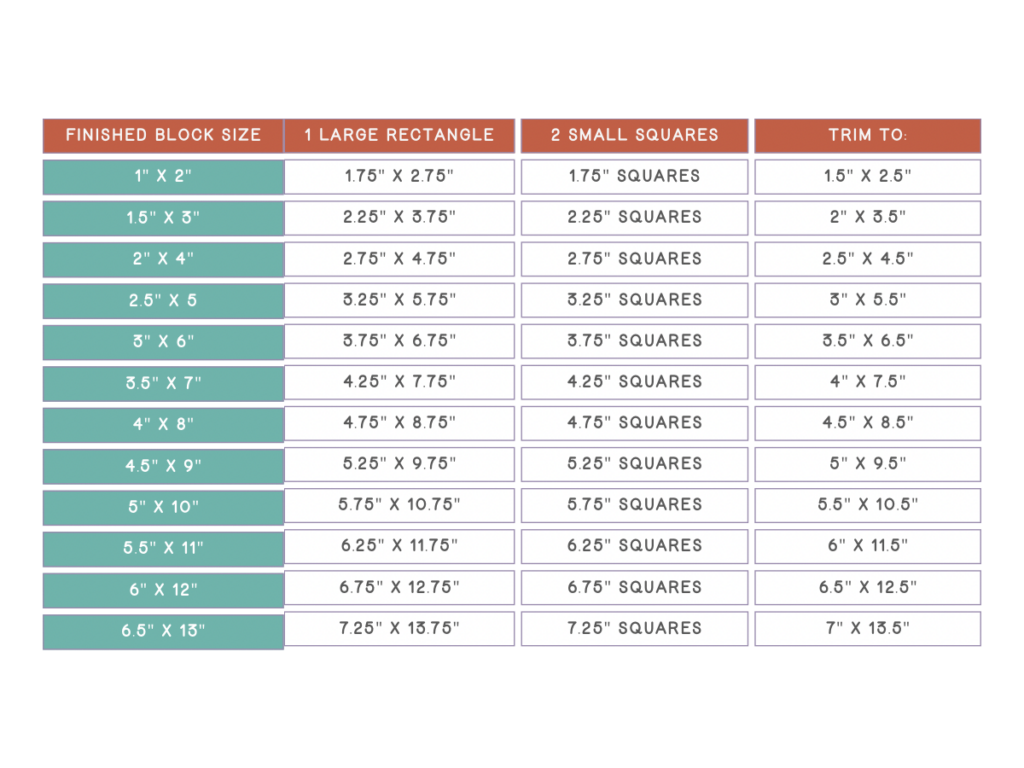
Flying Geese Formula Cutting Chart
Below is a chart to help you calculate the size of your fabric squares and rectangle to get the correct size of flying geese blocks. NOTE: This chart uses the finished size to calculate the size of the starting pieces
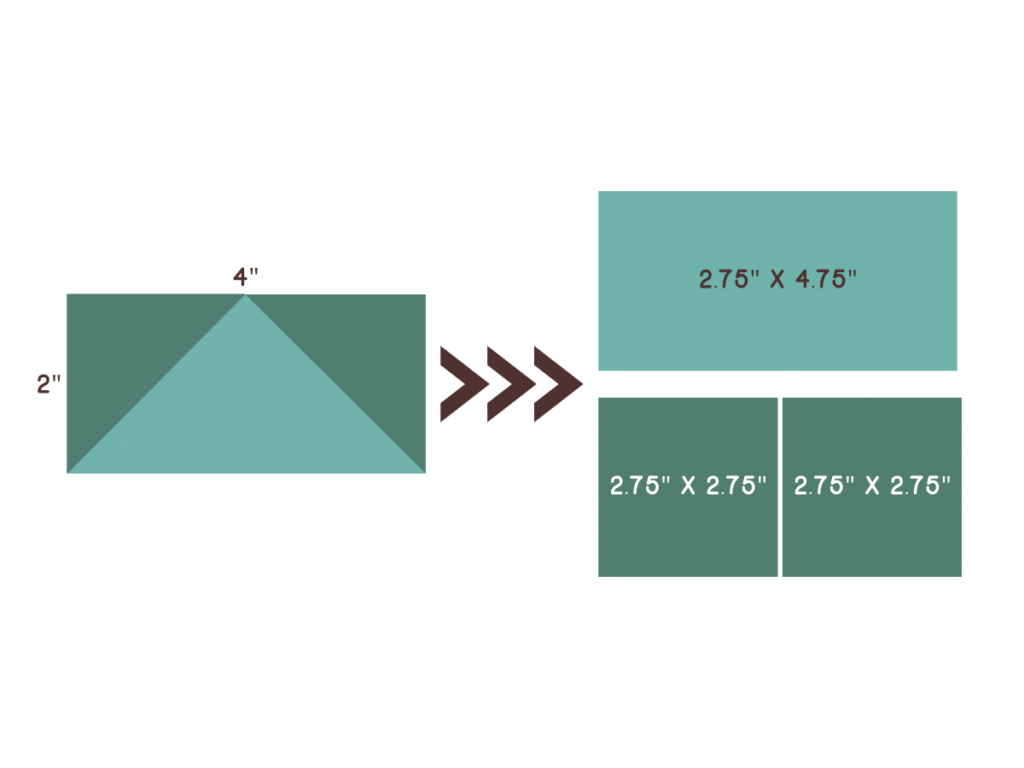
The stitch and flip method for making flying geese blocks always starts with 1 rectangle and 2 squares. Taking into consideration the 1/4″ seam allowance and leave room for trimming and squares, I suggest adding 3/4″ to the finished dimensions. For example, if your finished flying geese blocks needs to measure 2″ x 4″ then you should start with a rectangle measuring 2.75″ x 4.75″ and 2 squares measuring 2.75″ x 2.75″. This will leave you approximately a 1/4″ of wiggle room to trim your block to 2.5″ x 4.5″.
How to Make a Flying Geese Block
Materials Needed:
- Main Fabric (for the “goose”): 1 rectangle
- Background Fabric (for the “sky”): 2 squares
- Rotary cutter and mat
- Ruler
- Pins
- Sewing machine
- Thread
- Iron and ironing board
Step 1: Prepare Your Pieces
Cut the Fabrics: Cut one rectangle from the main fabric (the goose) and two squares from the background fabric (the sky).

Step 2: Mark the Background Squares
Draw Diagonal Lines: Using a ruler and fabric-safe marking tool, draw a diagonal line from one corner to the opposite corner on the wrong side of each background square.

Step 3: Place and Pin the First Square
Align the First Square: Place one background square right sides together on the left end of the rectangle. Ensure that the drawn diagonal line runs from the bottom left to the top right corner. Optionally, pin the square to keep it from shifting while sewing.

Step 4: Sew the First Seam
Sew Along the Line: Sew directly on the drawn line.

Press the Seam: Fold the fabric back to create a triangle and press the seam to the side. At this point, you can decide if any adjustments need to be made before trimming.

Trim the Excess Fabric: Un fold the square. Using your rotary cutter and ruler, trim 1/4″ away from the seam line on the outside, removing the corner of the rectangle and square. The excess fabric can be recycled or used to construct a half square triangle (HST) for a future project.

Step 5: Add the Second Square
Align the Second Square: Place the second background square on the other end of the rectangle, right sides together, with the diagonal line running from the top left to the bottom right corner. Optionally, pin the square to keep it from shifting while sewing.

Step 6: Sew the Second Seam
Sew Along the Line: Sew directly on the drawn line.

Press the Seam: Fold the fabric back to create a second triangle and press the seam to the side. Again, evaluate and decide if any adjustments need to be made before trimming.

Trim the Excess Fabric: Unfold the square. Using your rotary cutter and ruler, trim 1/4″ away from the seam line on the outside, cutting off the corner of the rectangle and square. The excess fabric can be recycled or used to construct another HST for a future project.


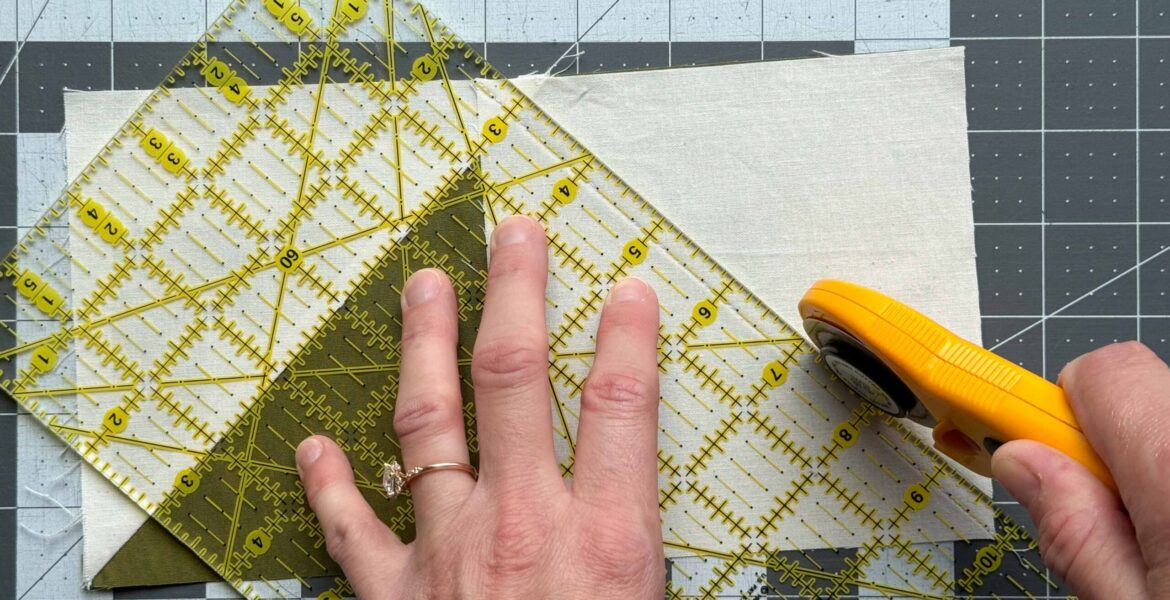
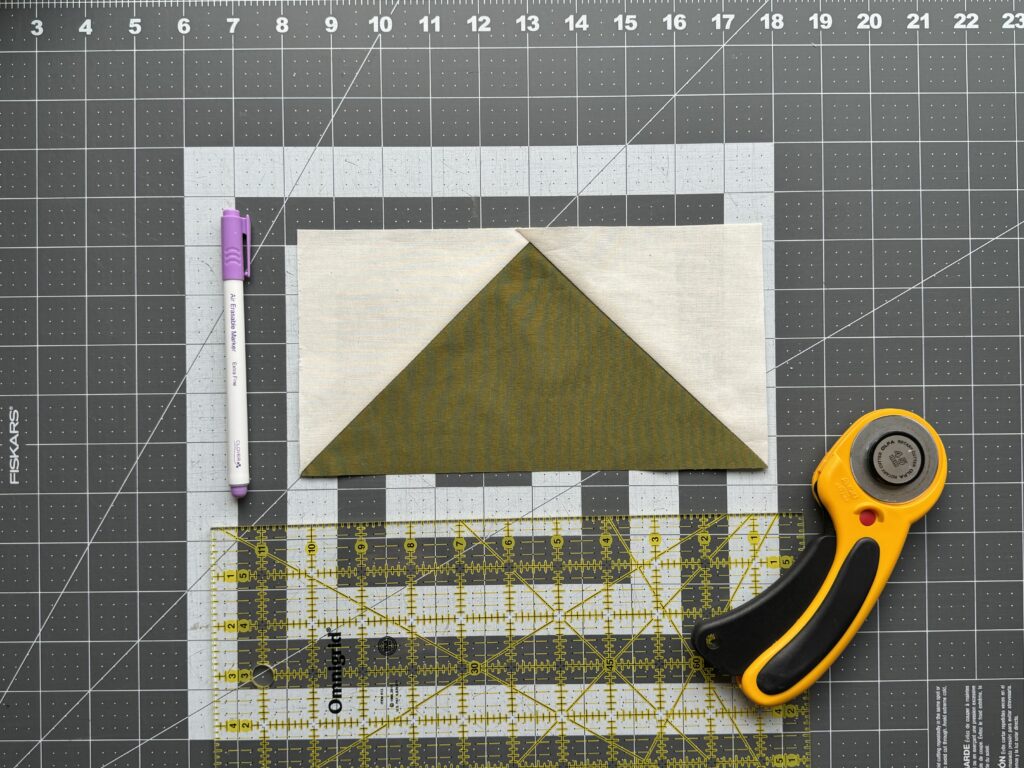
How to trim flying geese
The last step in making flying geese is trimming. As I said earlier, this method provides a little bit extra fabric to allow you to square up and trim your final blocks to the exact size needed. You can save some time trimming by using specialty rulers like the Creative Grids Ultimate Flying Geese Tool (which make units from sizes 1″ x 2″ up to 4″ x 8″ finished blocks) or the Loc Bloc Flying Geese Ruler (which make units from sizes 1/2″ x 1″ up to 4″ x 8″ finished blocks), but these can be an extra cost. Thankfully you can trim your blocks using an acrylic quilting ruler just as well.
To do this, lay your block on your cutting mat. Lay your quilting ruler over the block. There are several points I check before I start trimming. First, make sure to leave a 1/4″ seam allowance past the center point of the triangle. Next, I line up the center point with the half-way measurement of the length. In the example below, I am lining up the center point with the 4.75″ mark on my ruler. Lastly, I make sure there is enough excess fabric on all 4 sides of the block.
Once everything is lined up and you’ve double checked your measurements, trim the top and right edges (or top and left edges if you’re left-handed).

Rotate the block 180 degrees and trim the remaining two sides, taking care to line up the previously trimmed sides with the correct measurements. The block in the photos below is being trimmed to 5″ x 9.5″.

Pin it for Later
Find More Quilt Scouts Content
Featured Posts

Quilt Camp 2024: The Virtual Quilting Retreat for Quilt Scouts


How to Construct a Pennant Flag Quilt Block

How to Cut Fabric Using Paper Templates

Related Posts

6 Fun Ways to Show Off Your Quilt Scout Badges
Hey there, Quilt Scout! So you’ve earned your fair share of badges—congrats! Now, it’s time to …