

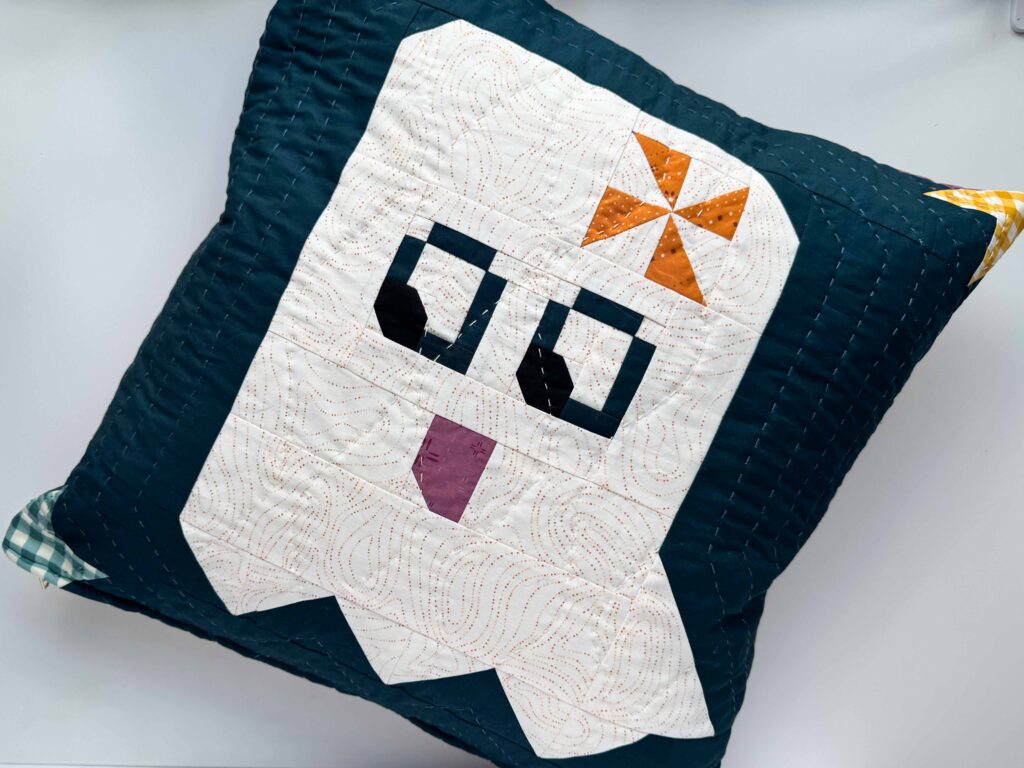
Ready to turn a favorite quilt block into something soft, spooky, and totally Scout-approved? In this tutorial, we’ll transform my hand-quilted Birdie Boo block into a cozy 22″ x 22″ zippered throw pillow cover — perfect for seasonal décor or year-round snuggles.
This is a great one-block project that helps you practice quilting, piecing layers, and installing a zipper — and it can easily be adapted for any pillow size.
Affiliate Disclosure: This post may contain affiliate links, which means I may earn a small commission if you purchase through them (at no extra cost to you). As an Amazon Associate, I earn from qualifying purchases.
🧵 Supplies
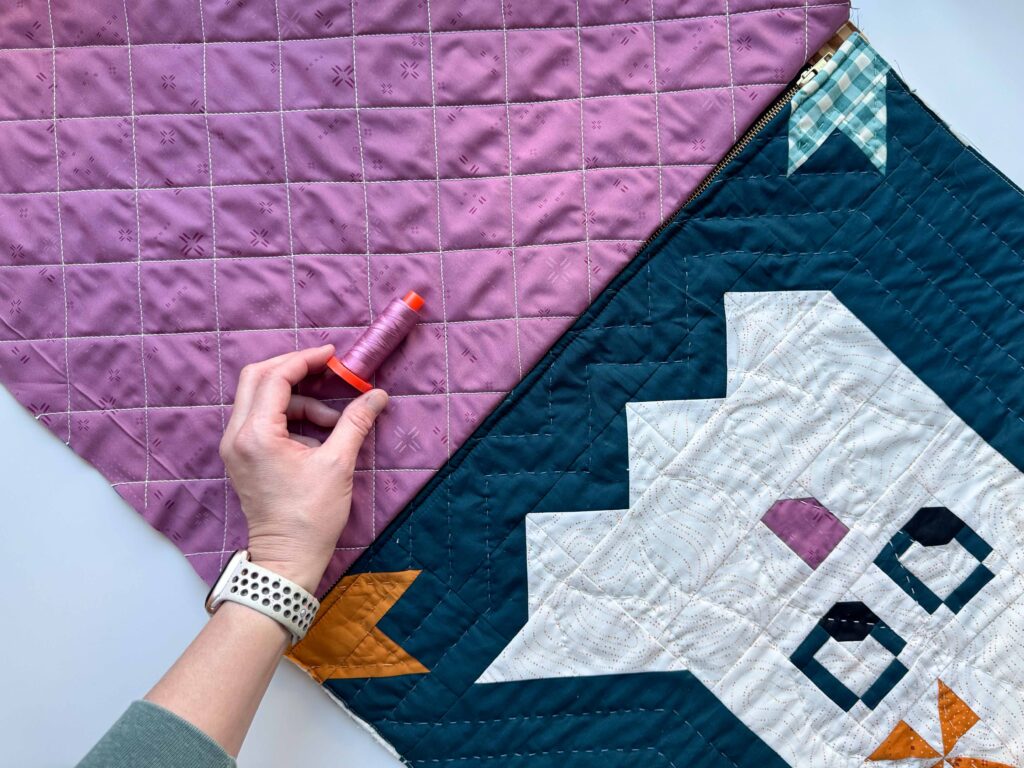
- (1) quilted block, 22″ × 22″ (I’m using my hand-quilted Birdie Boo block)
- (1) quilted back panel, 22″ × 22″
- (1) 22″ zipper — invisible or standard
- Quilt batting (scraps are perfect!)
- Scrap backing fabric for quilting
- Coordinating thread
- Pillow insert, 22″ × 22″
- Zipper foot, rotary cutter, and ruler
- Pinking shears or zigzag rotary cutter
How Big Should My Pillow Cover Be?
If you like a full, plump pillow, make your finished cover about 1″ smaller than your insert. So for a 22″ × 22″ insert, your finished cover should be about 21″ × 21″.
When I started, my block measured about 22½″ × 22½″ before quilting, and it shrunk just a bit after quilting — giving me that perfect snug fit.
How to Use Scrap Batting
This is a great chance to use up small batting pieces. Just butt the raw edges together and join them with a wide zigzag stitch — no overlapping needed. It’ll disappear inside your pillow and no one will ever know!
🪡 Step-by-Step: Sew the Pillow Cover
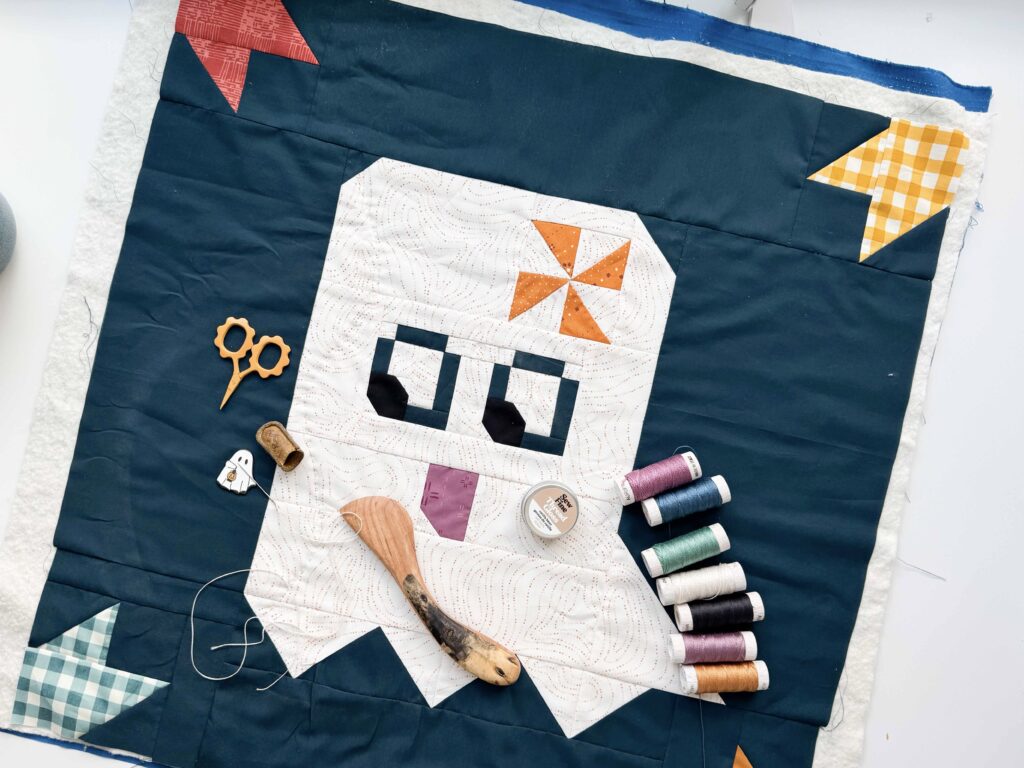
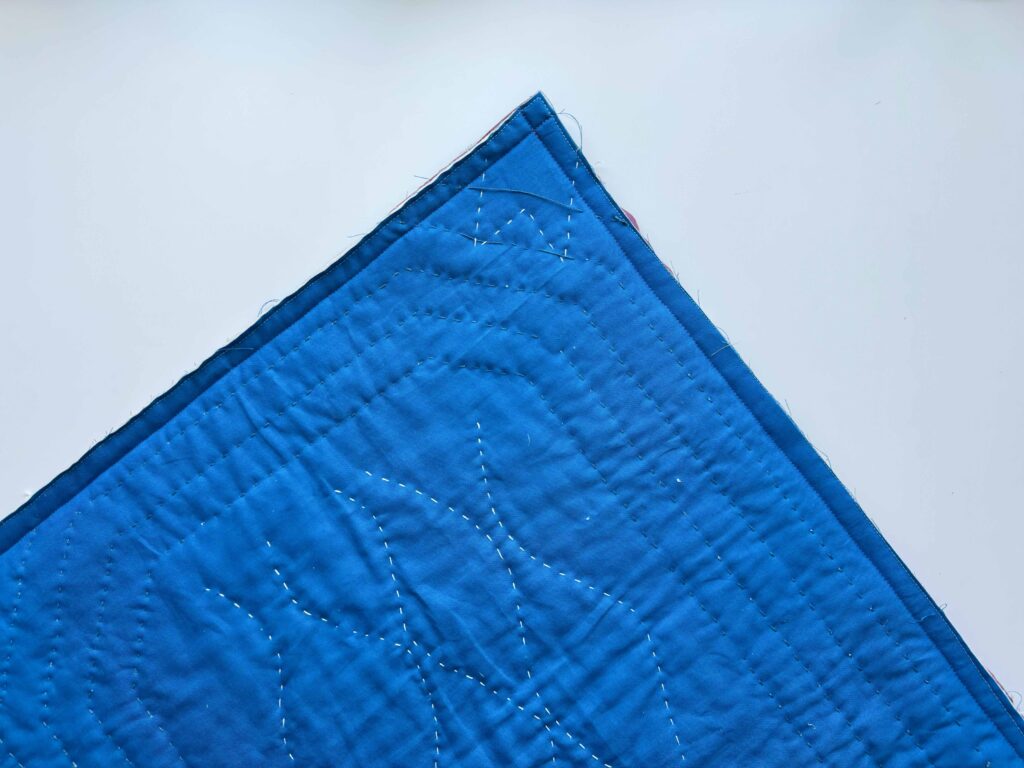
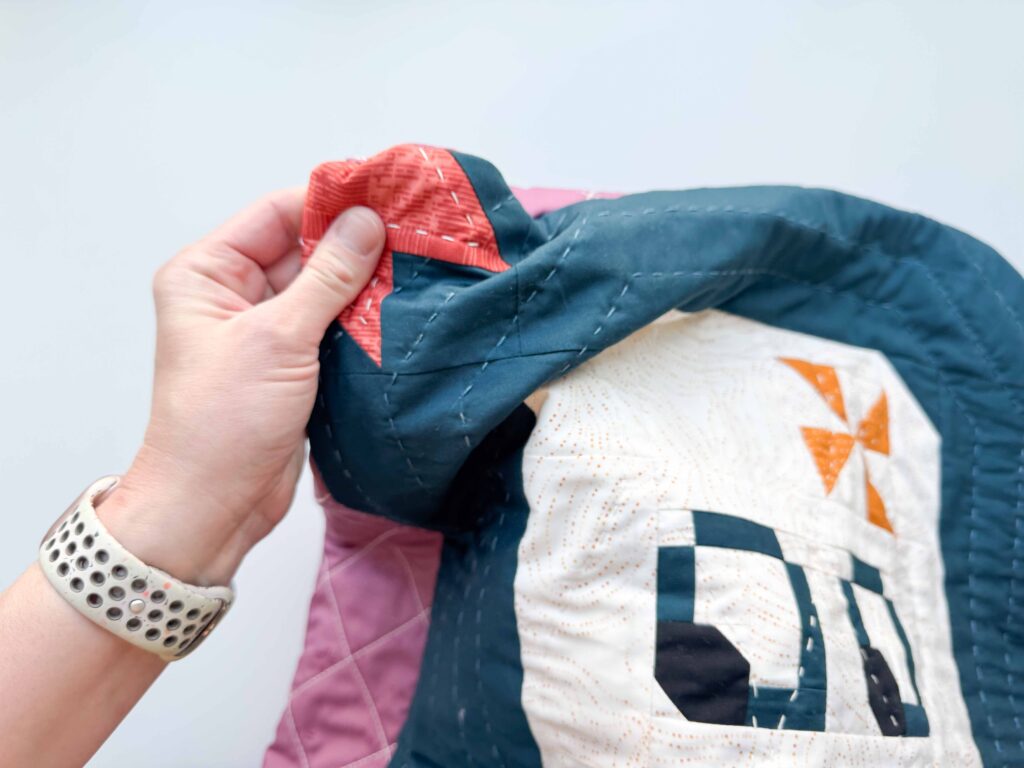
1. Quilt the Front Panel
Layer your pieces like this:
Scrap backing → batting → quilt block.
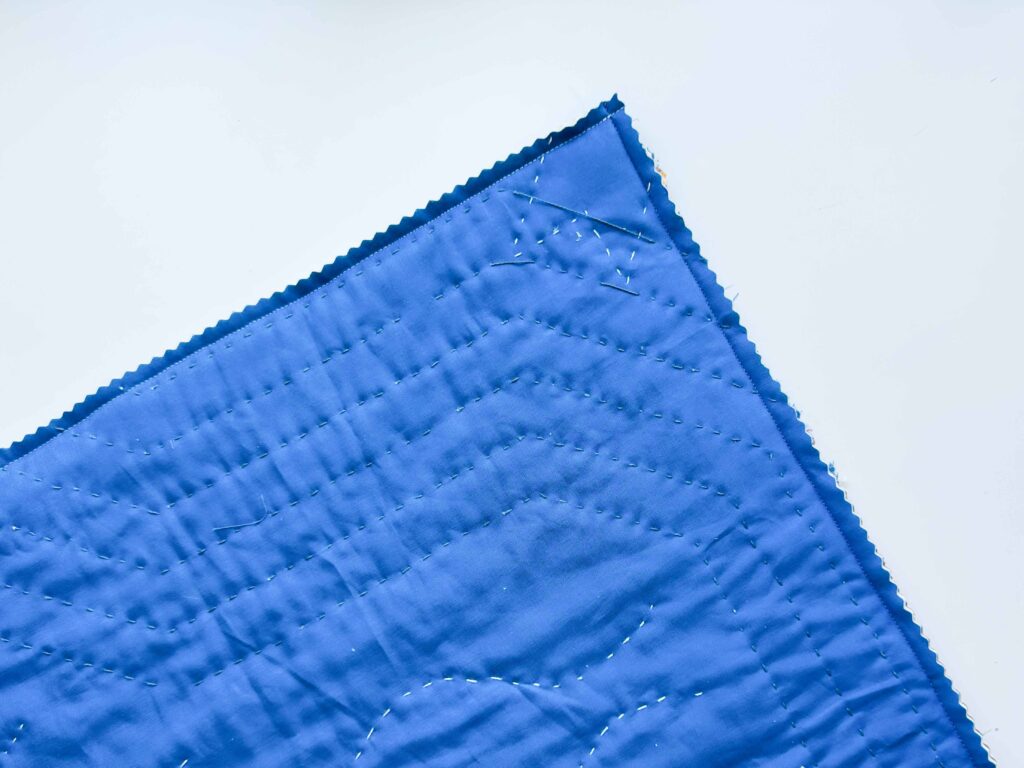
Baste the layers together using your favorite method (spray, pins, or basting stitches). Then quilt however your Scout heart desires — straight lines, grids, or something free-motion and fancy. I hand-quilted mine using Aurifil’s new 8wt thread. Once quilted, trim and square the block to 22″ × 22″.
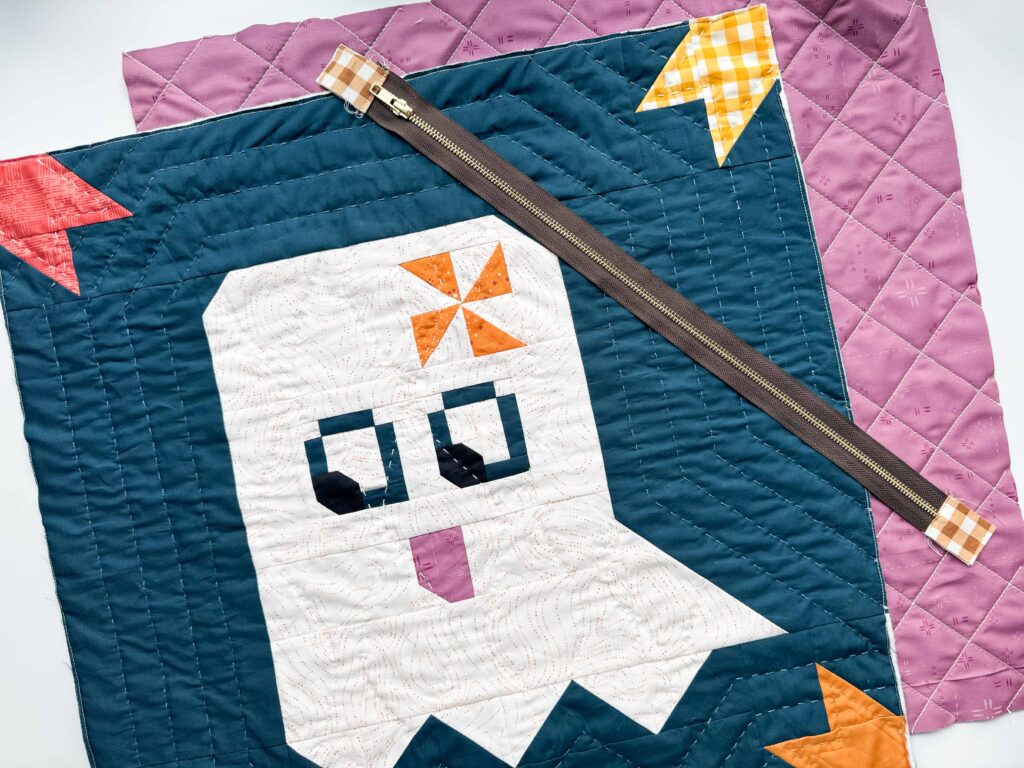
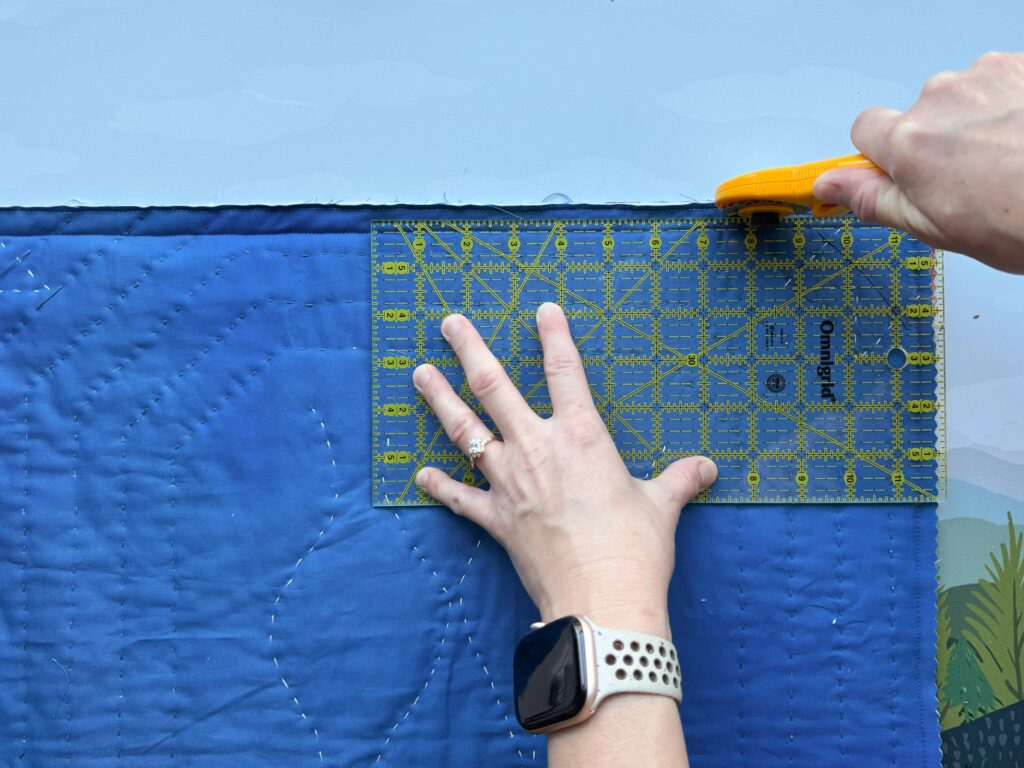
2. Cut the Back Panel
Quilt a second panel for the back of the pillow. This can be another pieced block or a whole-cloth quilt (like I did). Trim and square the panel to match the front.
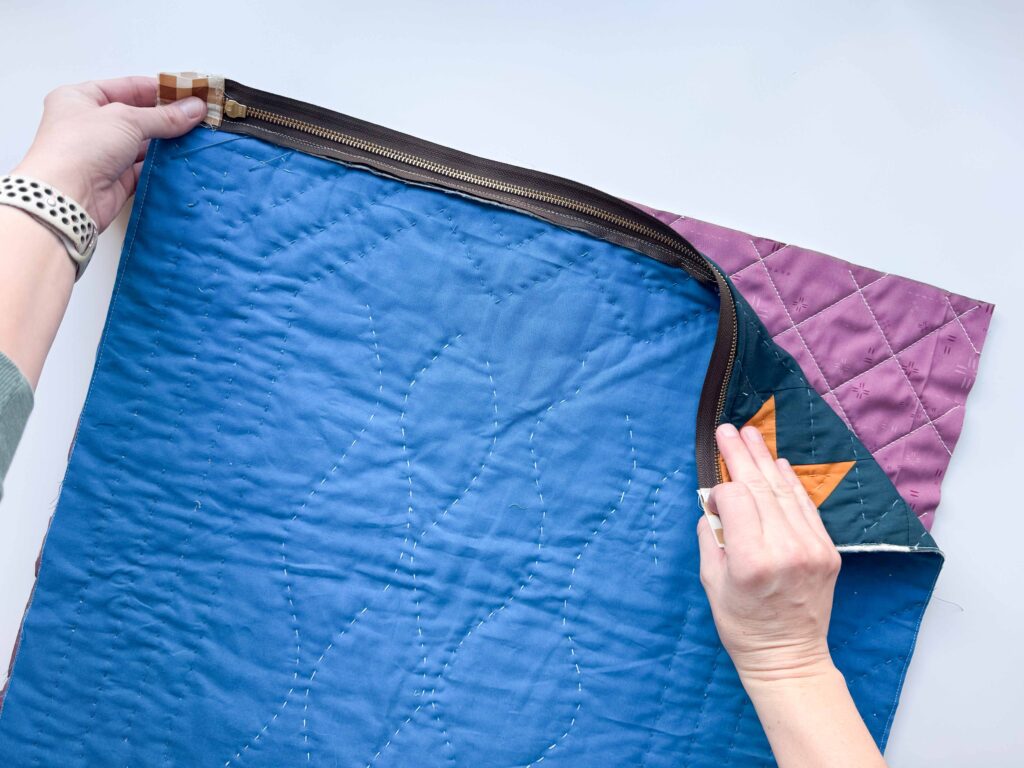
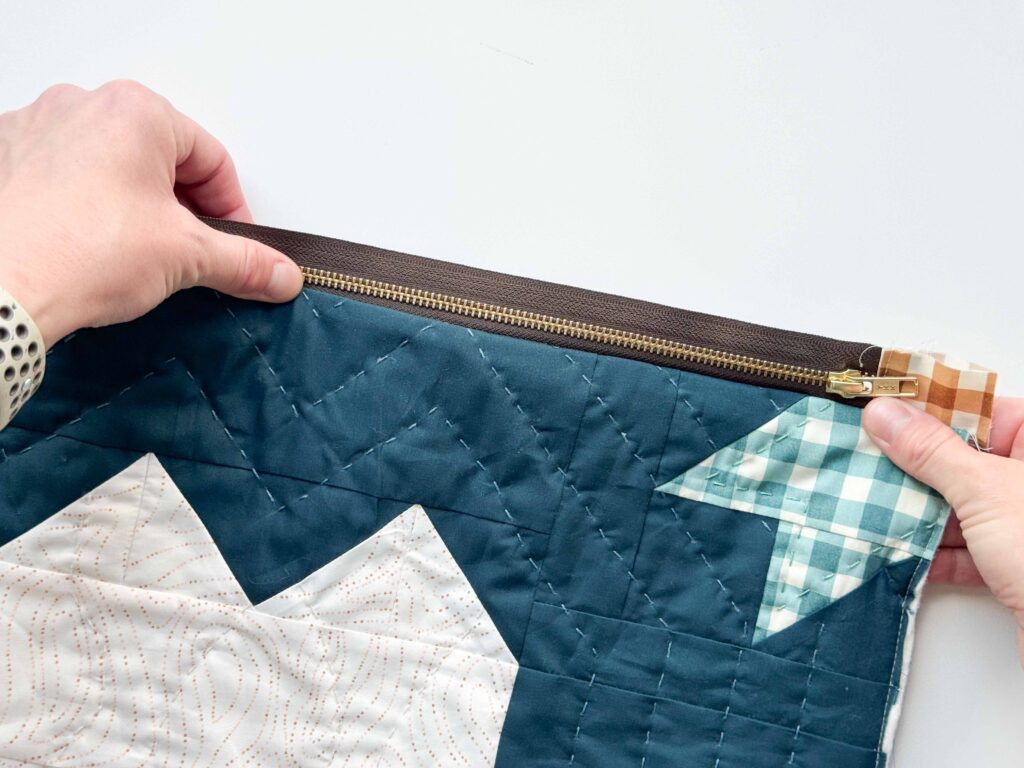
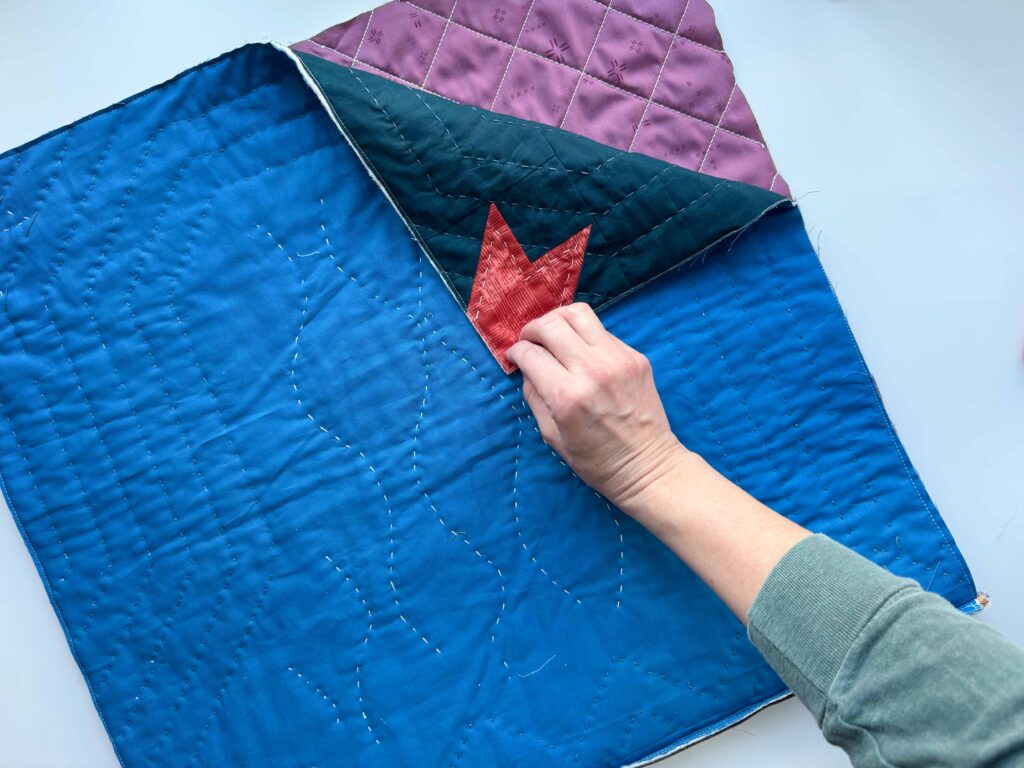
3. Add Fabric Tabs to the Zipper
For a clean, professional finish, sew fabric tabs to both ends of your zipper.
Cut two pieces of fabric about 6″ long and the same width (or slightly wider) than your zipper.
Fold in the raw edges by ¼″, then fold each piece in half and press again.
Attach one tab to each end of the zipper following these steps:
- Sandwich the zipper end inside the tab.
- Sew ⅛″ from the folded edge.
- Trim away the zipper’s metal stop if needed (make sure your zipper pull is in the middle!).
- Fold the tab closed and topstitch ⅛″ from the folded edge.
Your finished zipper (with tabs) should match the width of your pillow panels.

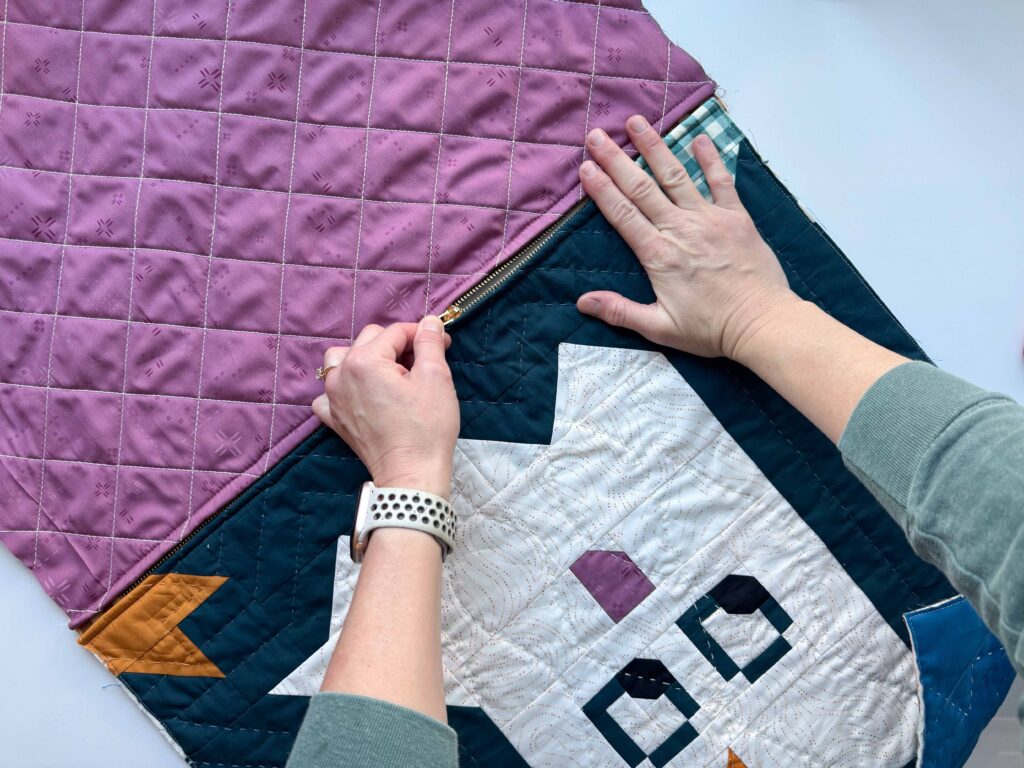
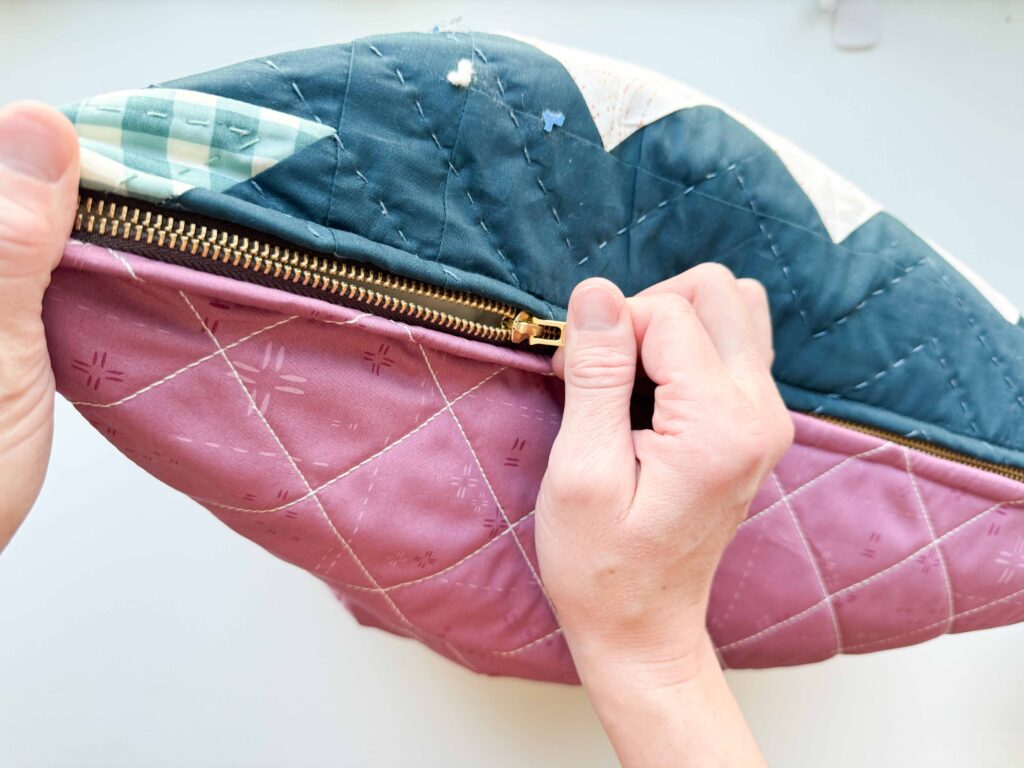
4. Attach the Zipper
Lay your front panel right side up, then place the zipper right side down along the bottom edge. Clip or pin in place.
Using a zipper foot, sew about ¼″ from the edge, as close to the zipper teeth as possible.
When you reach the zipper pull, stop with your needle down, lift the presser foot, slide the pull past, lower the presser foot, and continue sewing.

Repeat this step to attach the quilted back panel to the other side of the zipper (right sides together).
Once both sides are attached, fold each quilted panel back so the folded edge partially covers the zipper. This creates a partially hidden zipper.
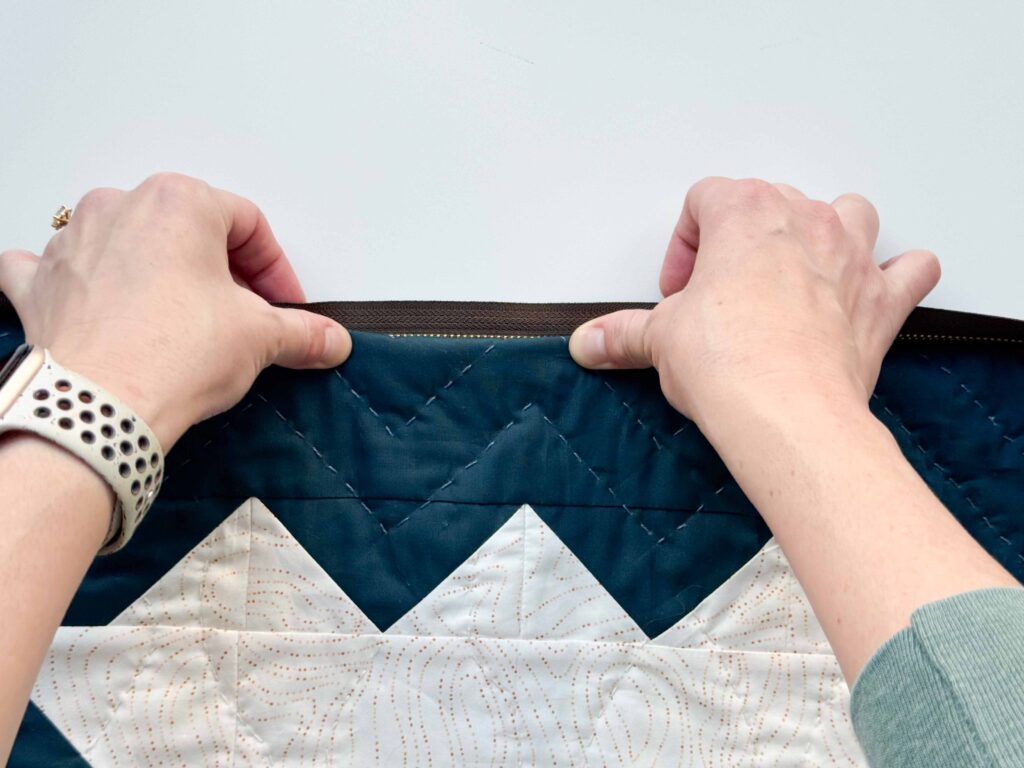
Topstitch along each side about ¼″ from the fold so the zipper lays flat. Match your thread to your fabric color for a tidy finish — this small detail makes a big difference!
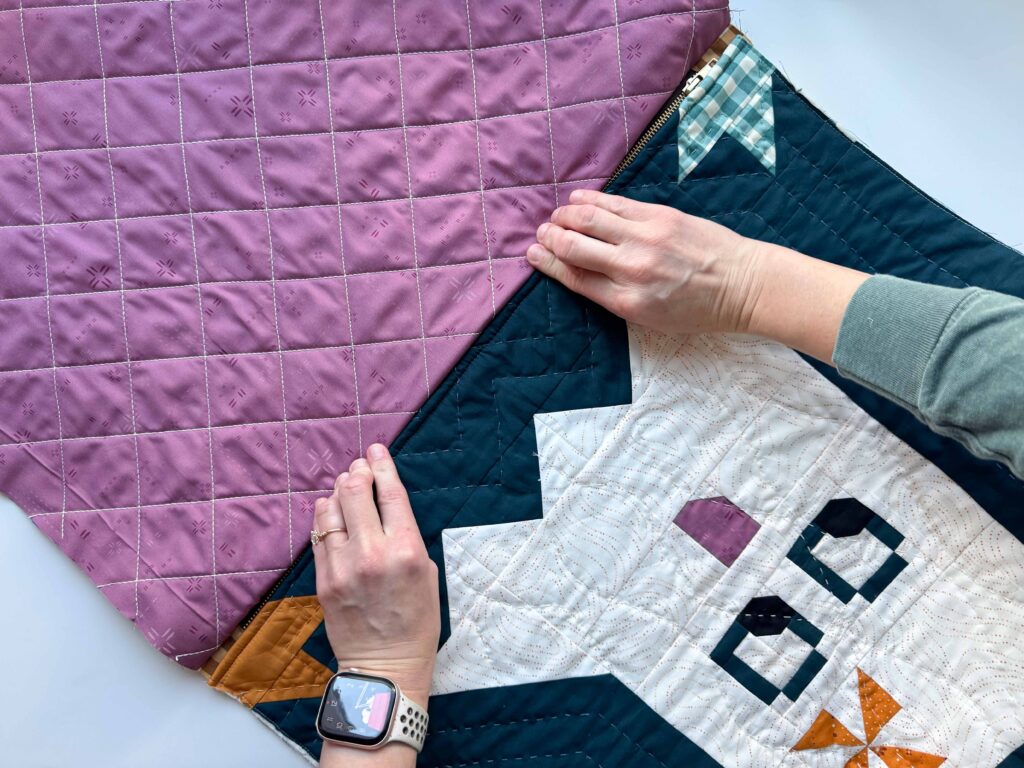
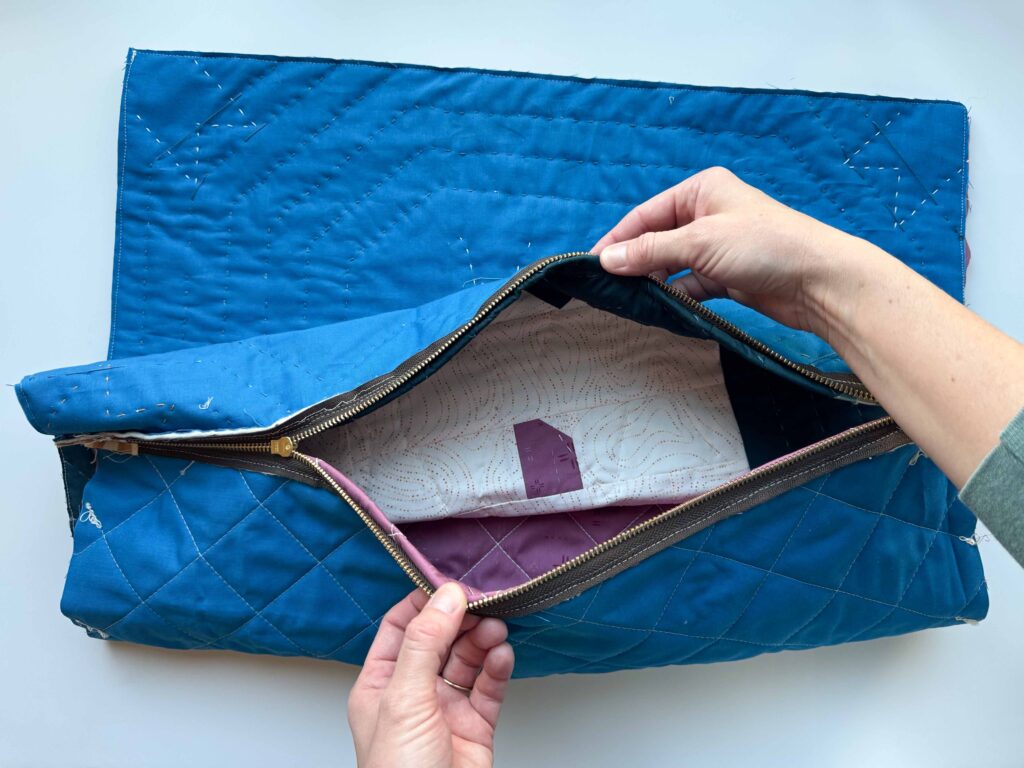
5. Sew the Pillow Closed
Unzip the zipper — trust me, don’t skip this. With right sides together, pin all the remaining edges. Sew around the other three sides using a ½″ seam allowance.
Use pinking shears or a zigzag rotary cutter to trim the seam allowances and clip the corners to reduce bulk — but be careful not to cut through your stitches.

6. Turn & Fluff
Turn the pillow cover right side out through the zipper opening. Use a point-turner to get crisp corners.
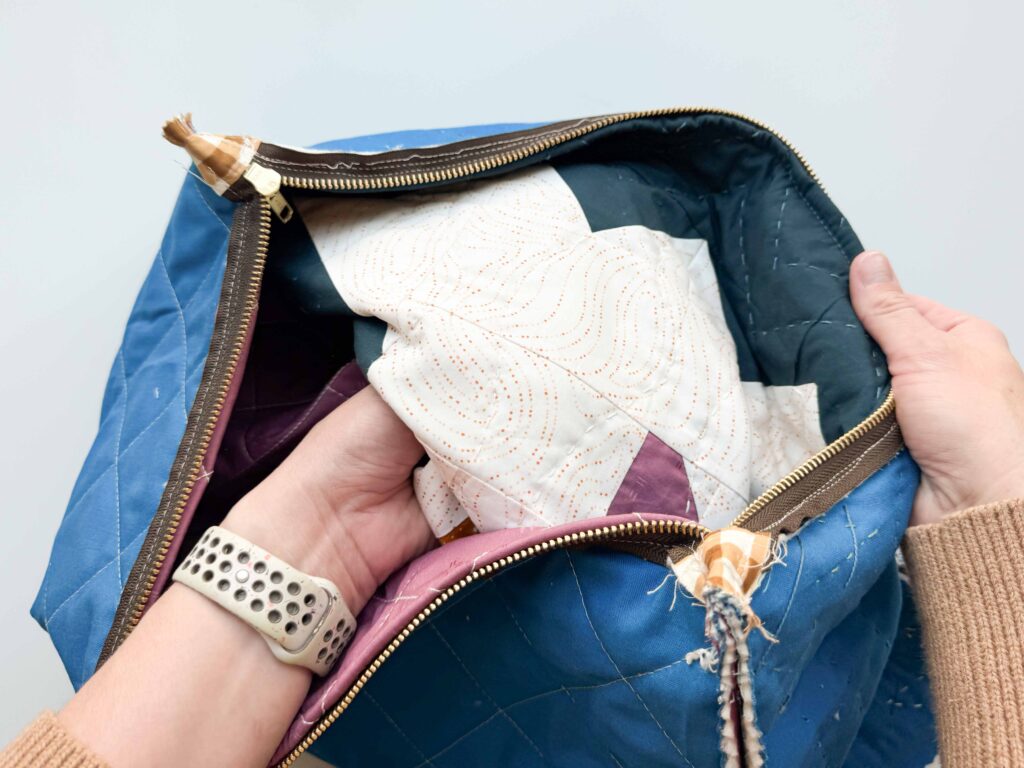
Press lightly, stuff your pillow insert inside, zip it up, and give it a good fluff.

🏕️ Scout Reflections
This project is a great way to:
- Turn a single block into practical home décor
- Practice installing zippers on quilted layers
- Use up scrap batting and leftover backing fabric
Once you make one, you’ll want to outfit every couch and camper with a quilted pillow!


+ show Comments
- Hide Comments
add a comment