

Let’s face it, quilters are tough. We’ve all taken a rotary blade to the knuckle, stepped on a pin, or scorched a finger with an overly enthusiastic press. So why not stitch up a little something that’s as prepared as you are?
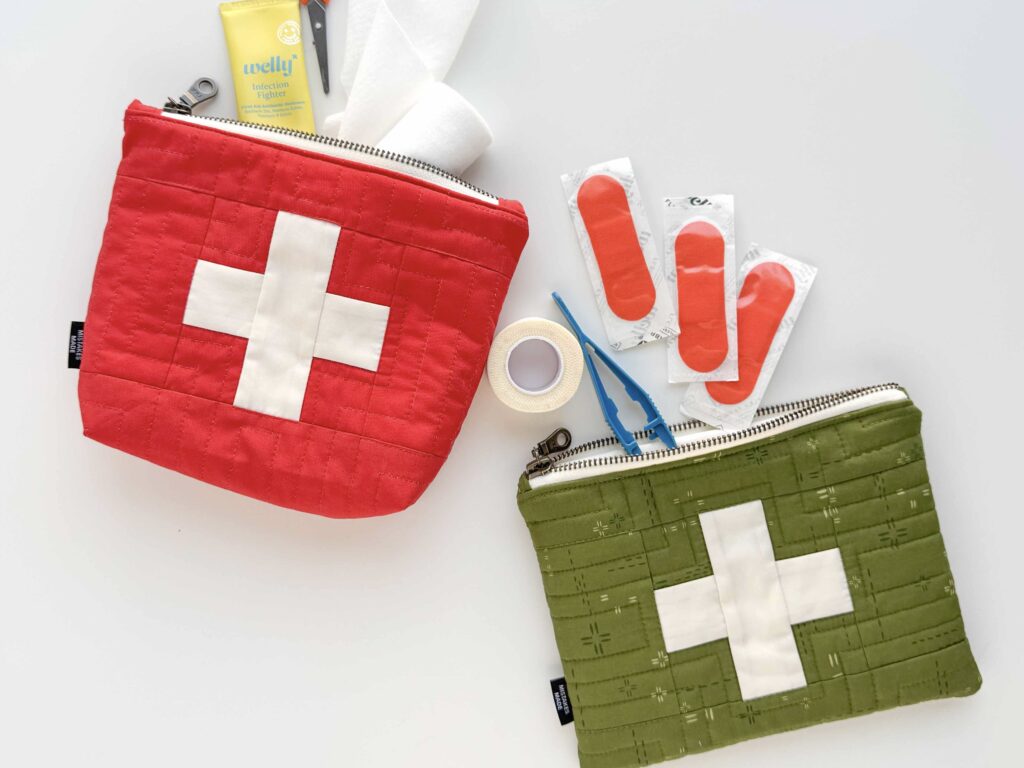
Enter: the quilted first aid kit. Cute? Yes. Practical? Also yes. A little tongue-in-cheek about the chaos of creative life? Absolutely.
Why Every Quilter Needs One
You might be thinking, “Do I really need a whole pouch for Band-Aids?” But hear me out—this tiny kit packs a punch.
Here are just a few things to stash inside:
- Adhesive bandages (because we know that ruler slipped again)
- Alcohol wipes
- Blister pads
- Lip balm or mini salve tin
- Tiny scissors or nail clippers
- Chocolate square (emotional first aid is real)
- Safety pins, needle threader, extra bobbin (because… sewing emergencies)
Bonus: it’s the perfect zip pouch to toss in your hiking bag, project tote, or glove box.
What You’ll Need to Make One
This is a great beginner-friendly sewing project and a fun intro to zipper installation! Here’s what you’ll want to gather:
- Three coordinating fat eighths (outer panel, lining, and contrast accent)
- 8″ metal or nylon zipper
- Quilt Batting
- Coordinating Thread
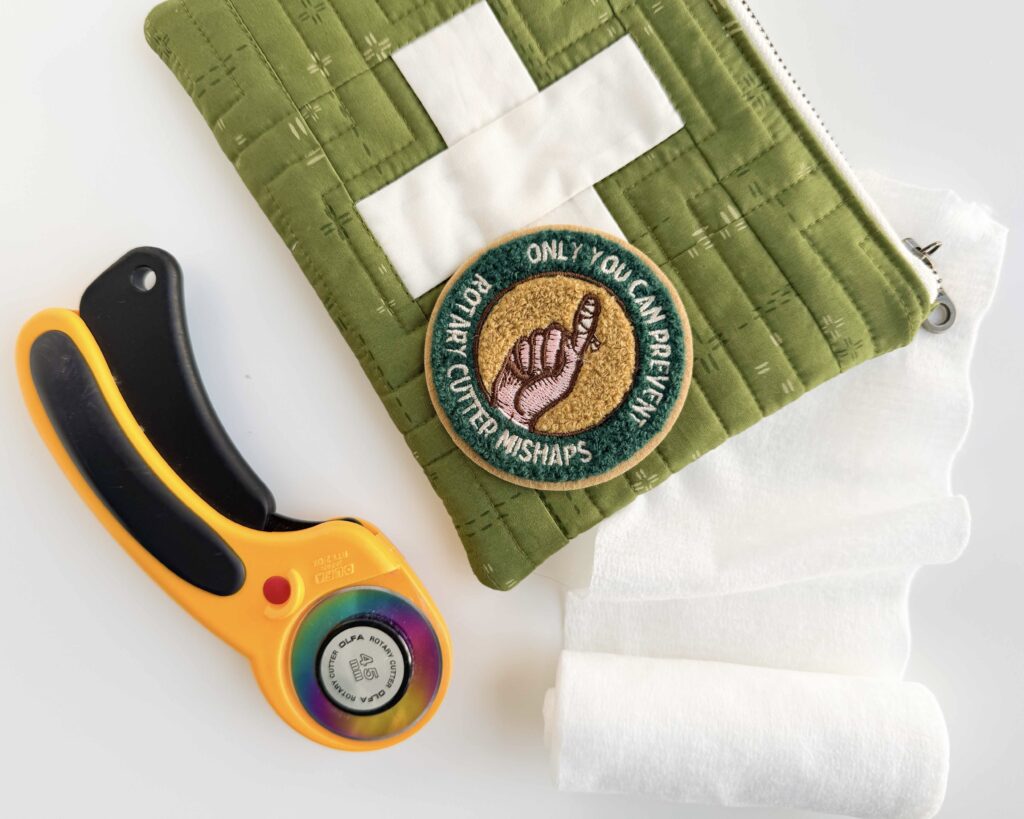
- Woven label or patch for a cheeky finishing touch
Pssst… you can grab a ready-to-go Ouch Pouch Kit in the Quilt Scouts shop with everything you need, including high-quality fabrics, a zipper, Aurifil thread, and custom woven labels. These babies are limited edition, so snag one while you can.

Safety First, Always
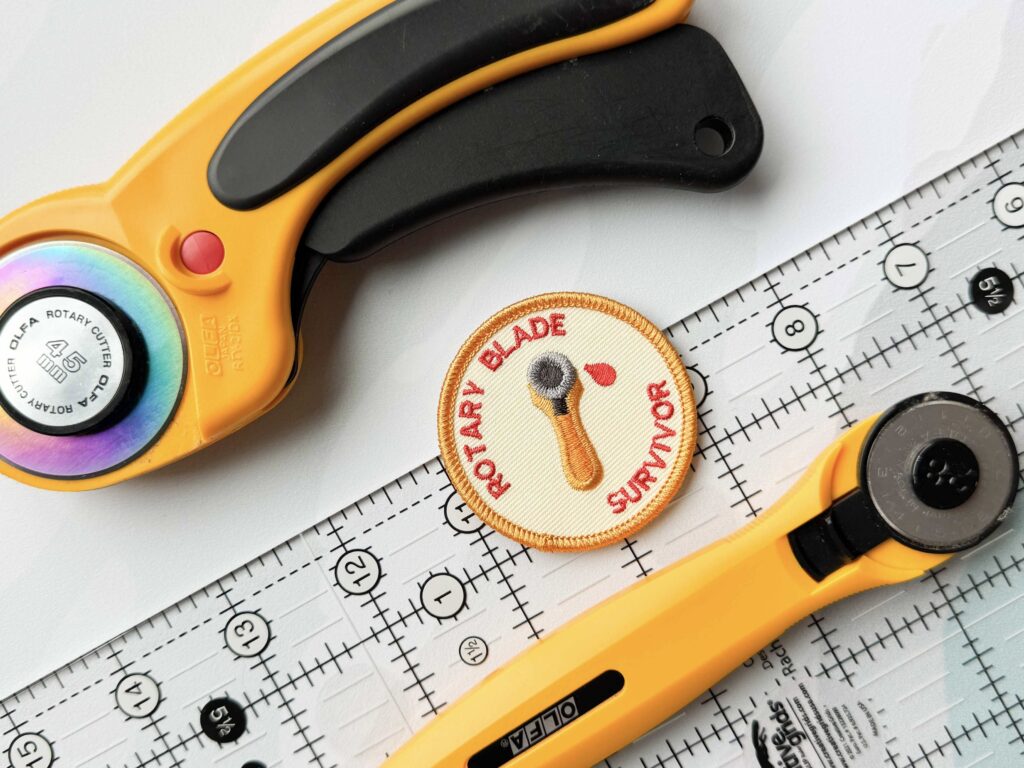
This project was inspired by our monthly Quilt Scouts badge, Rotary Blade Survivor—a lighthearted way to celebrate the scars (literal and metaphorical) that come from our beloved rotary cutters.
So while you stitch your pouch, let it be a little reminder to:
- Replace your blade regularly
- Use a ruler with a non-slip grip
- Keep fingers a safe distance from the blade path
- Cut standing up with good posture
- NEVER rush while cutting. (Seriously. Just don’t.)
Want the Full Tutorial?
The full step-by-step Ouch Pouch tutorial (plus zipper installation and boxed corner video walkthroughs!) is available exclusively inside the Quilt Scouts member portal.
Join the troop and earn your Rotary Blade Survivor badge while you’re at it! Members get:
- The free Ouch Pouch pattern
- Exclusive video tutorials
- A free badge every month
- Access to our full archive of projects + challenges
👉 Become a Quilt Scout now and stitch up your own badge-worthy pouch.


+ show Comments
- Hide Comments
add a comment