

If you’ve got 20 minutes, a couple of scrappy squares, and one lone gift card waiting for a cozy home, then buckle up, Scout. Today we’re stitching up the cutest little fabric gift card holder.
This mini make is beginner-friendly, stash-friendly, and holiday-gifting friendly. It hangs like a tag (hello, adorable stocking stuffer) and is sturdy enough to reuse year after year. Plus, it’s a super fun way to show off your favorite prints without committing to a whole quilt block.
Grab your scissors and a cup of something warm — let’s sew!

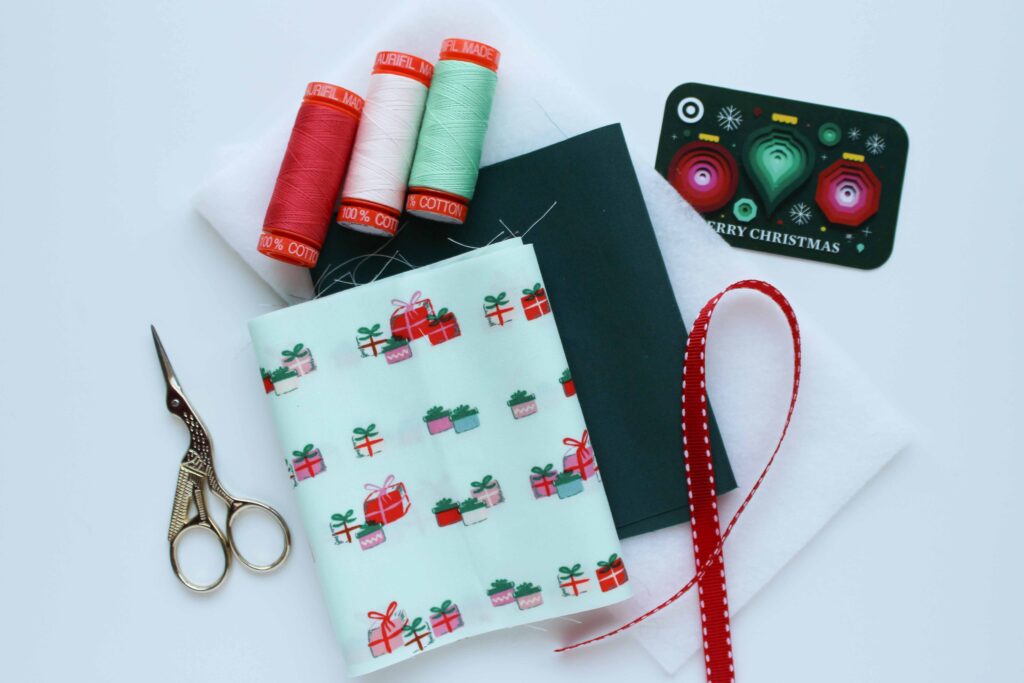
✂️ Supplies You’ll Need
- Fabric A: 6″ square
- Fabric B: 6″ square
- Fusible fleece: 6″ square
- Ribbon or twine: 12″ long
- The Gift Card Holder template (print at 100%)
- Thread, scissors or rotary cutter, iron, pins/clips
- Optional: point turner (or a chopstick if we’re keeping it rustic)
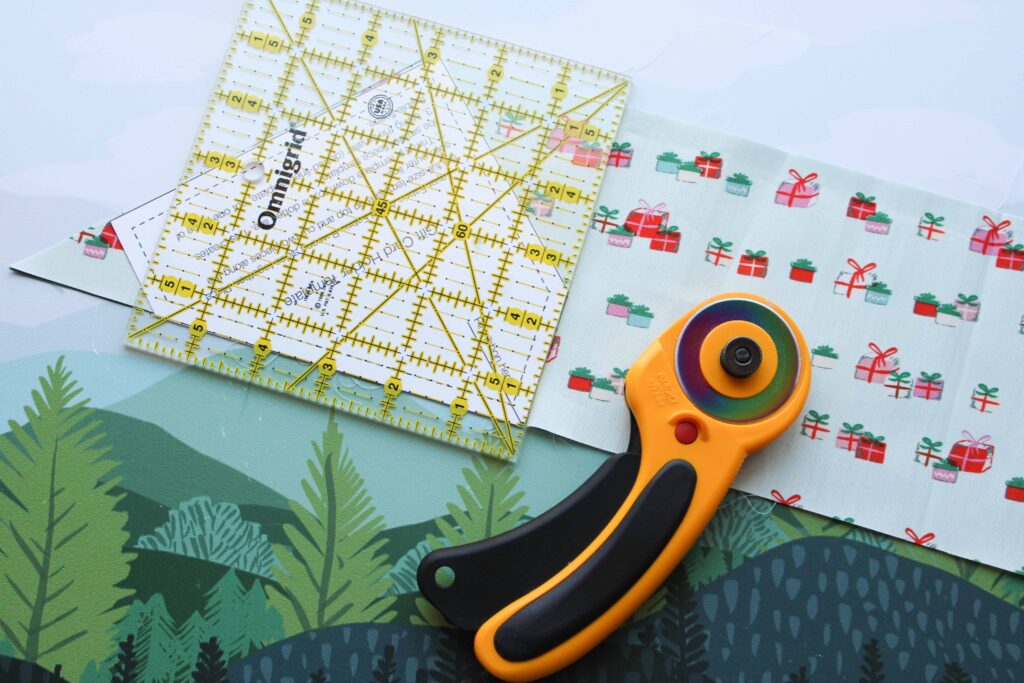
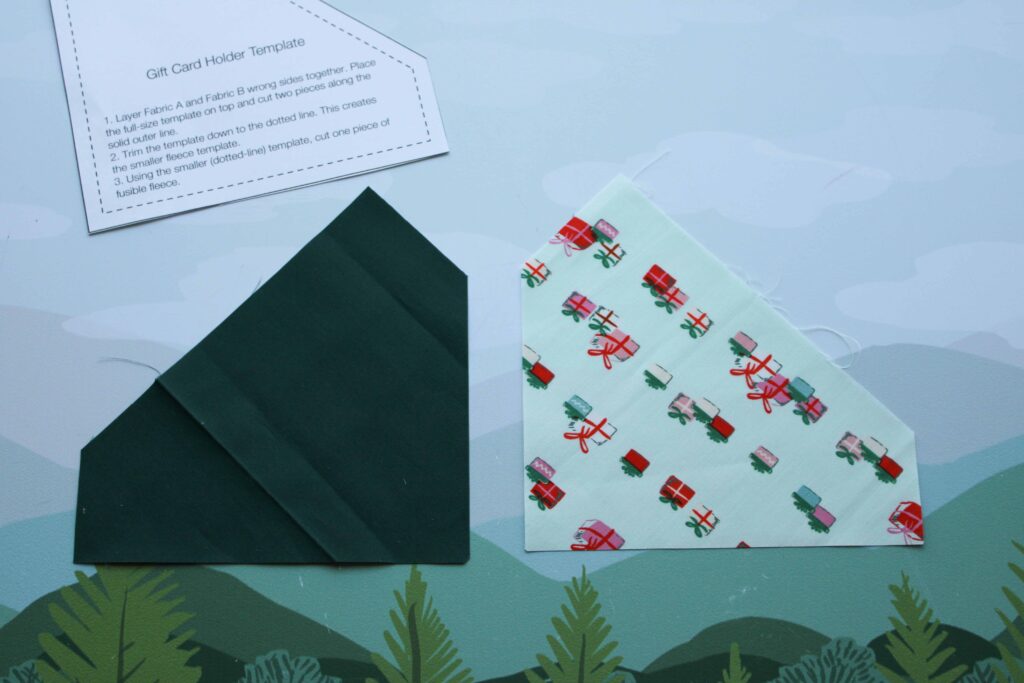
Step 1: Cut Out Your Pieces
Start by layering your fabrics wrong sides together. Place the template on top and cut out two matching pieces using the solid outer line.
Now trim the template down to the dotted line — this gives you the fleece-sized version. Use the smaller template to cut one fusible fleece piece.
📝 Tip: When you cut Fabric A and Fabric B at the same time, the two pieces become perfect mirror images — ideal for this kind of flip-and-sew project.
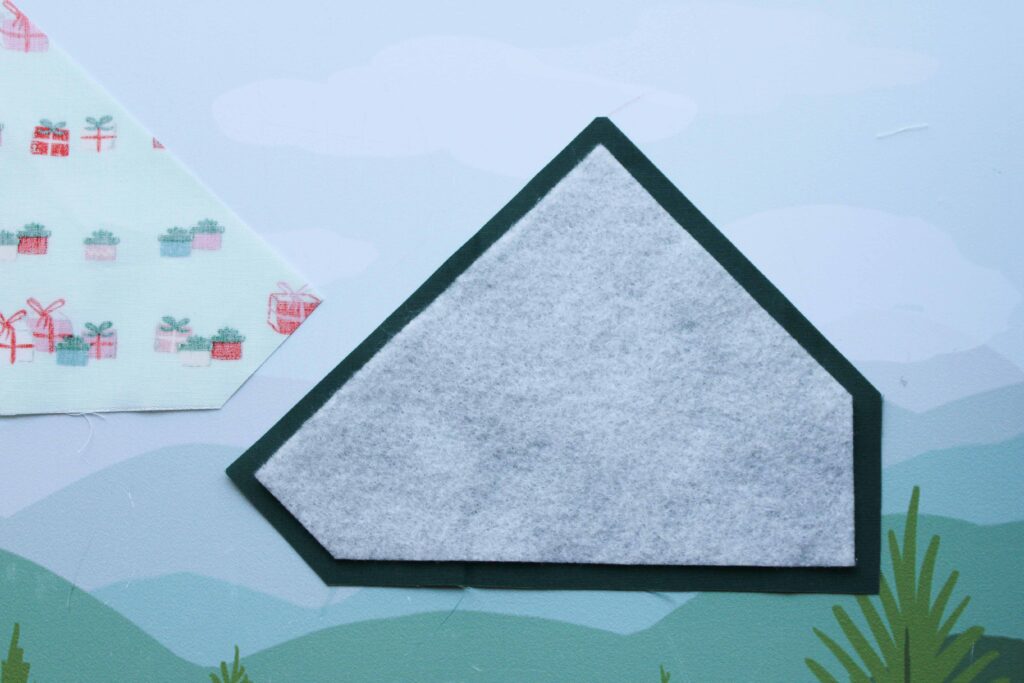
Step 2: Fuse the Fleece
Place the fusible fleece on the wrong side of either fabric piece (your choice!).
Press according to the fleece instructions until it’s fully attached.
You’ll have one piece that feels a little cushy and one that doesn’t — that’s exactly what we want.
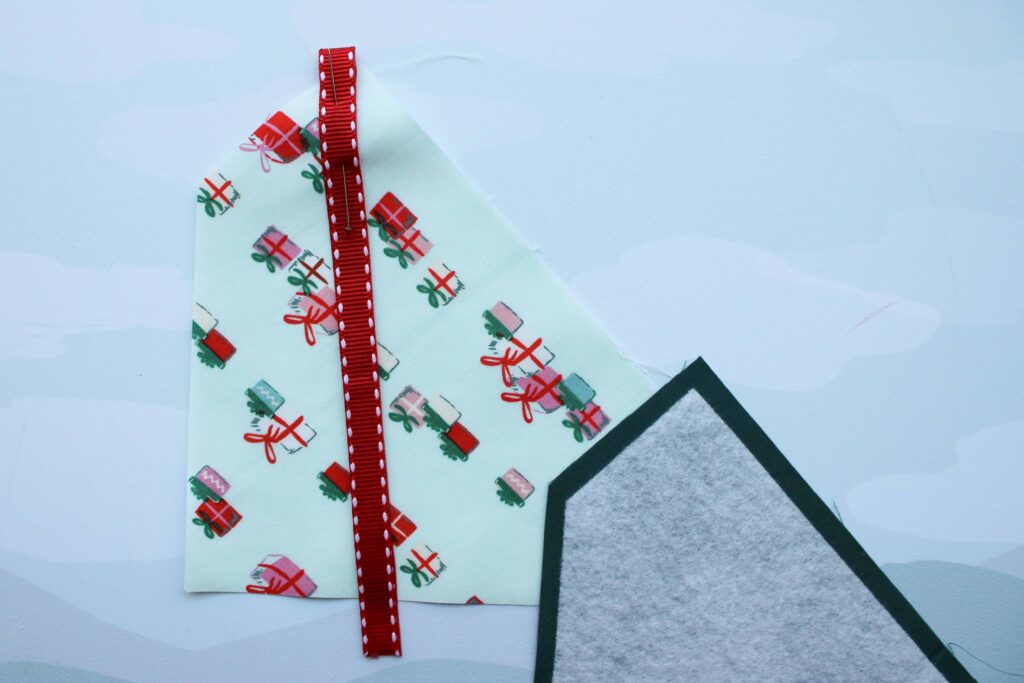
Step 3: Add the Hanging Loop
Fold your ribbon or twine in half.
Layer your two fabric pieces right sides together.
Tuck the folded ribbon loop between the two layers, matching the fold to the placement mark on the template.
Keep the raw ends inside the project — the loop should be sticking out of the seam when we turn it.
Clip or pin everything so it stays put.
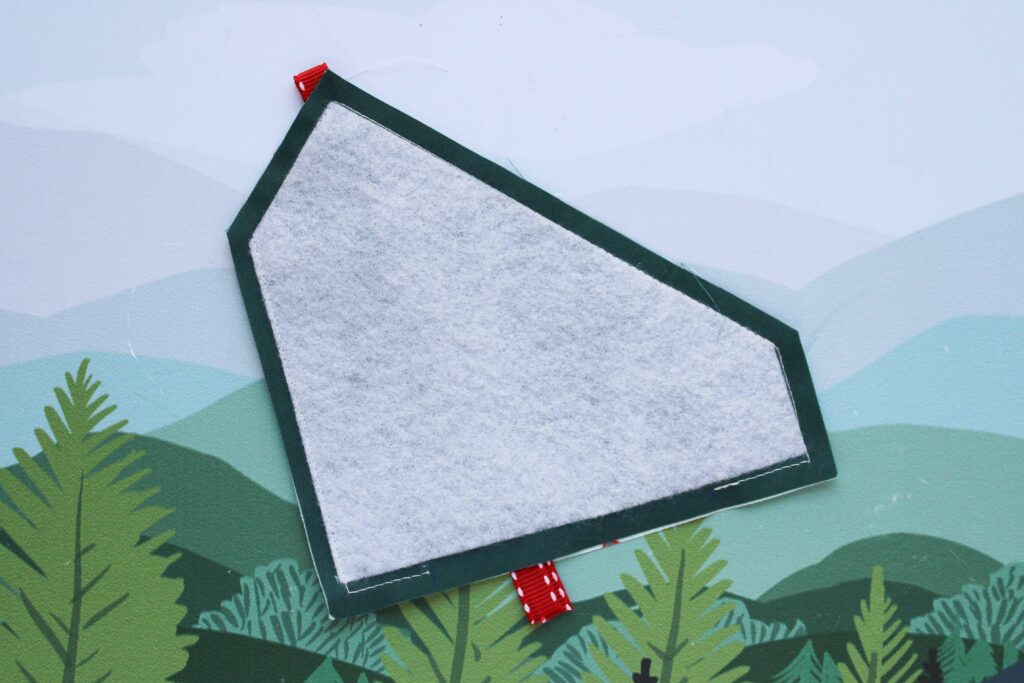
Step 4: Sew Around the Edge
Using a ¼” seam allowance, sew all the way around the shape.
Make sure to:
- Leave a 2″ opening along the bottom edge for turning
- Backstitch at the start and end of the opening
- Curve gently around the rounded top
Once you’ve sewn around, your little pocket-to-be is ready for trimming.
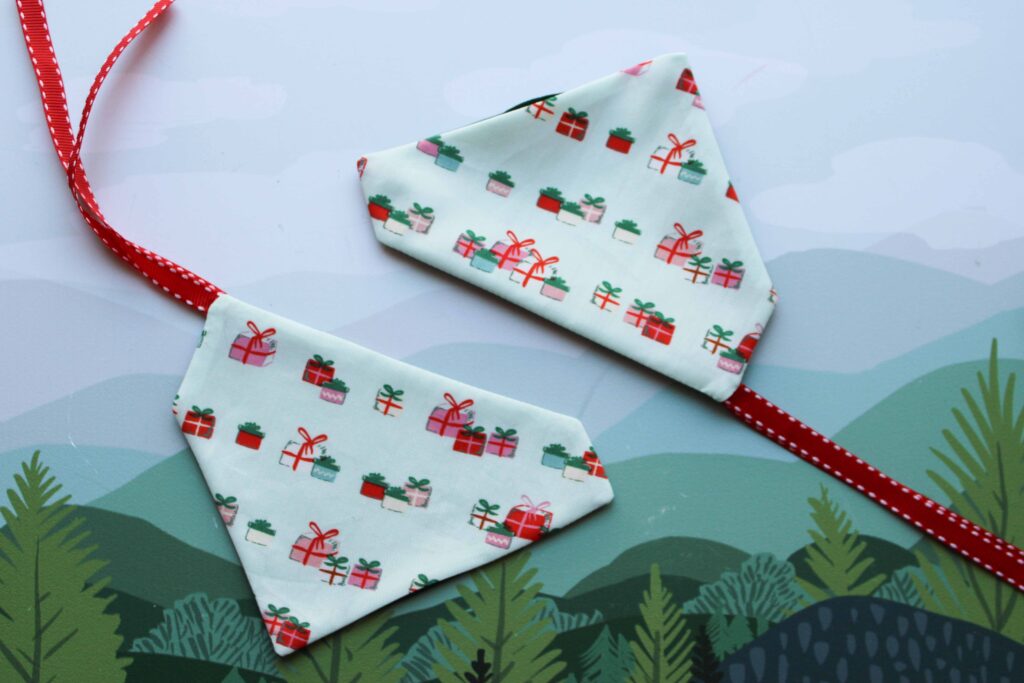
Step 5: Trim + Turn
Clip the curves and trim the corners to reduce bulk (but don’t snip your stitches!).
Turn the whole thing right side out through the opening.
Use your point turner to nudge those corners into shape.
Give it a nice press so everything lays flat and crisp.
Fold the raw edges of the turning gap inward and press again.
Step 6: Fold + Topstitch
Fold the whole piece in half — this instantly creates the gift card pocket.
Give the fold a quick press.
Topstitch ⅛” around the entire outer edge, closing the turning opening and giving the project that clean, finished outline.
Pop in a gift card and admire your handiwork.
Then make, like… five more. (You’ll see.)
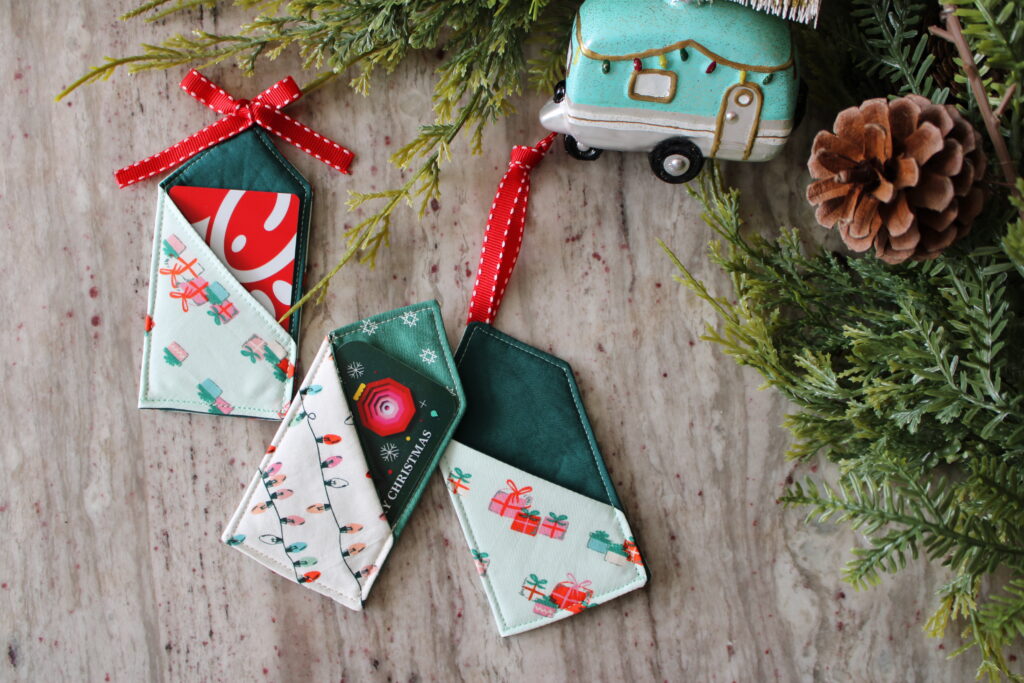
You Did It!
Your tiny fabric gift card holder is ready to:
- Hang on a tree
- Top a wrapped present
- Slip into a stocking
- Hold a secret note for someone special
- Or stash inside your Scoutmas Advent Calendar (I mean… just sayin’)
If you sew one, tag me — I’d love to see how you make it your own.
Want more quick patterns like this?
This mini-project is part of the Quilt Scouts Digital Advent Calendar, a free daily surprise delivered to your inbox from December 1–24. Think patterns, recipes, printables, surprise downloads, Scout-themed goodies, and plenty of holiday cheer for quilters. It’s totally free and open to everyone — Quilt Scouts member or not.


I can’t seem to find the template to print anywhere…